


Continuous Integration (CI) is a software engineering practice in which developers regularly merge their code changes into a central repository, and automated builds and tests are run on the code to detect errors as early as possible. The goal of CI is to ensure that code changes can be quickly and reliably integrated, and that the software can be built and tested in an automated and repeatable way.
AWS CodePipeline is a fully-managed continuous delivery service that helps you automate your release pipelines for fast and reliable application and infrastructure updates. With CodePipeline, you can define a series of stages that represent a workflow for your code changes, such as build, test, and deploy. CodePipeline integrates with other AWS services, such as AWS CodeBuild, AWS CodeCommit, and AWS CodeDeploy, to help you automate the build, test, and deployment process for your applications. CodePipeline can also be integrated with third-party tools such as Jenkins and GitHub.
In summary, AWS CodePipeline helps with CI by automating the build, test, and deployment process for your code changes, enabling you to quickly and reliably deliver updates to your applications and infrastructure.
Setting up the Environment
Before we start, make sure you have an AWS account, and you have the necessary permissions to create and manage the services we will be using in this tutorial. You will also need the AWS CLI installed and configured on your machine.
Flow Diagraam
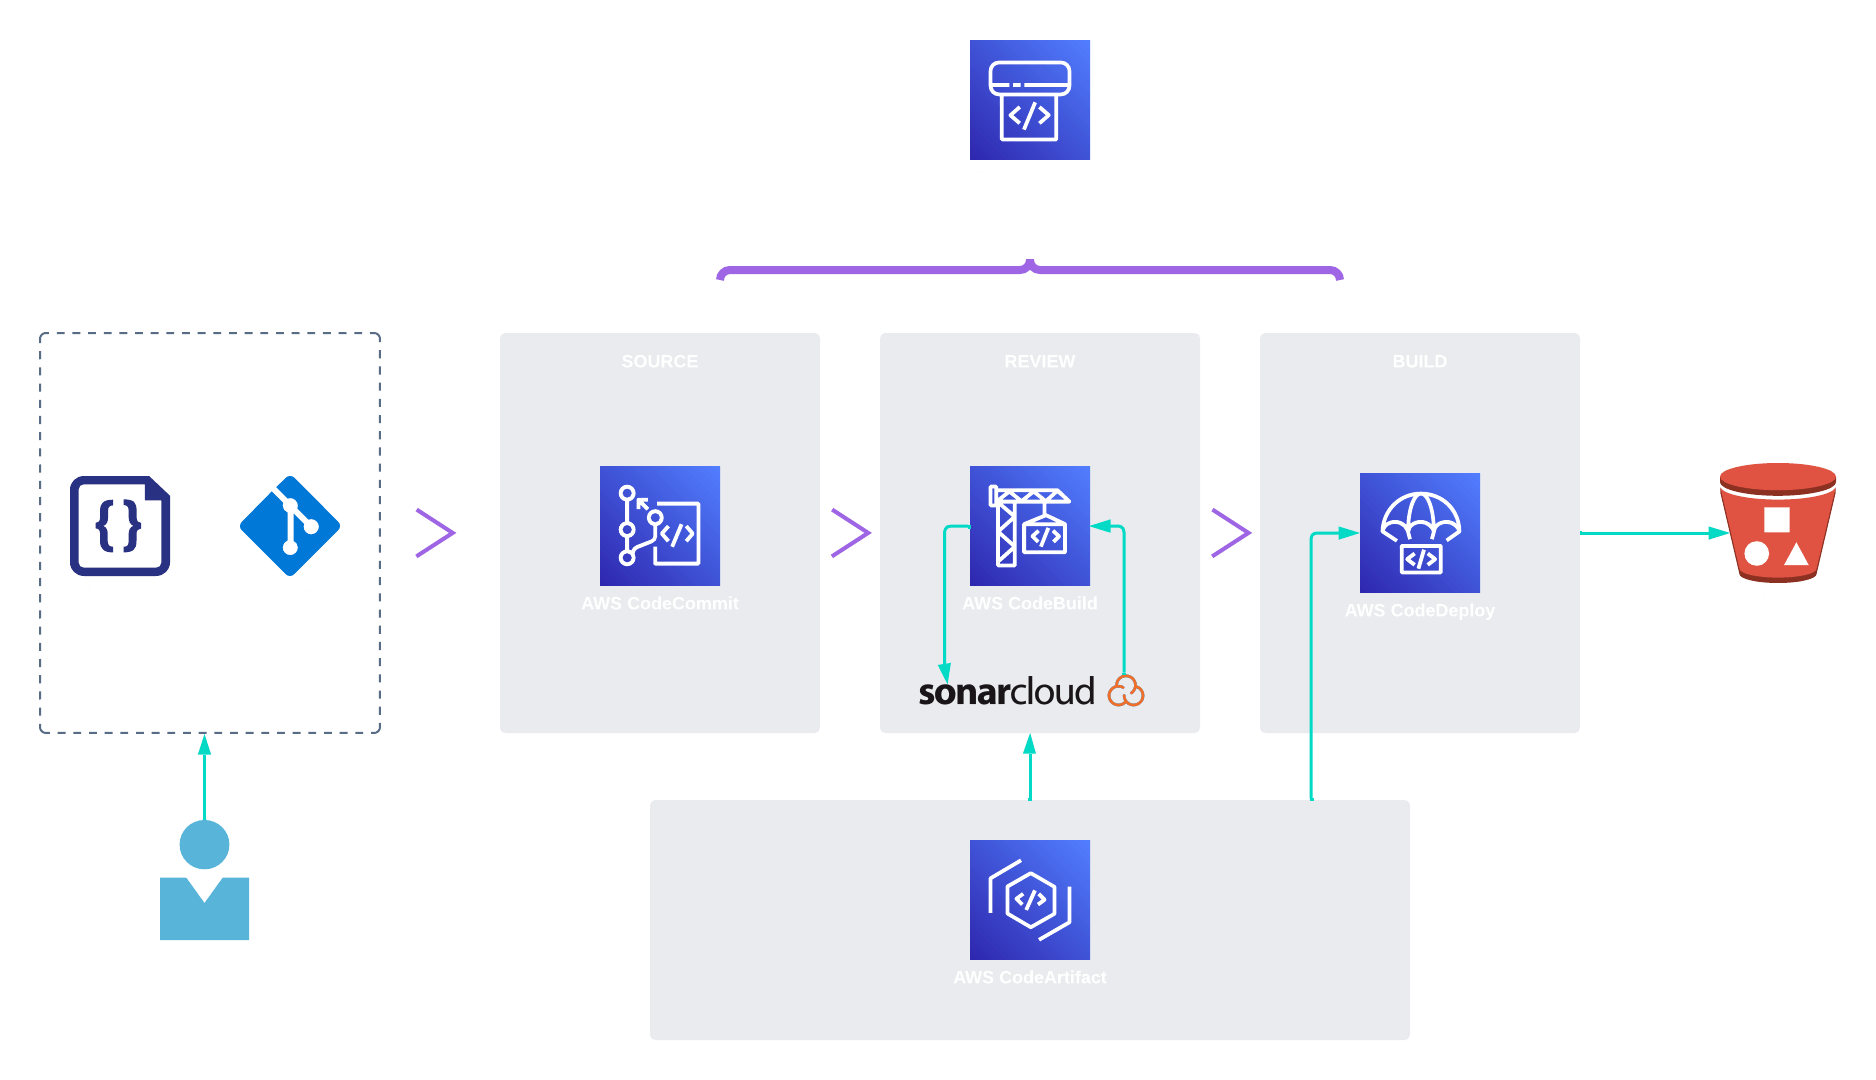
Step 1: Create an S3 Bucket & Parameter Store
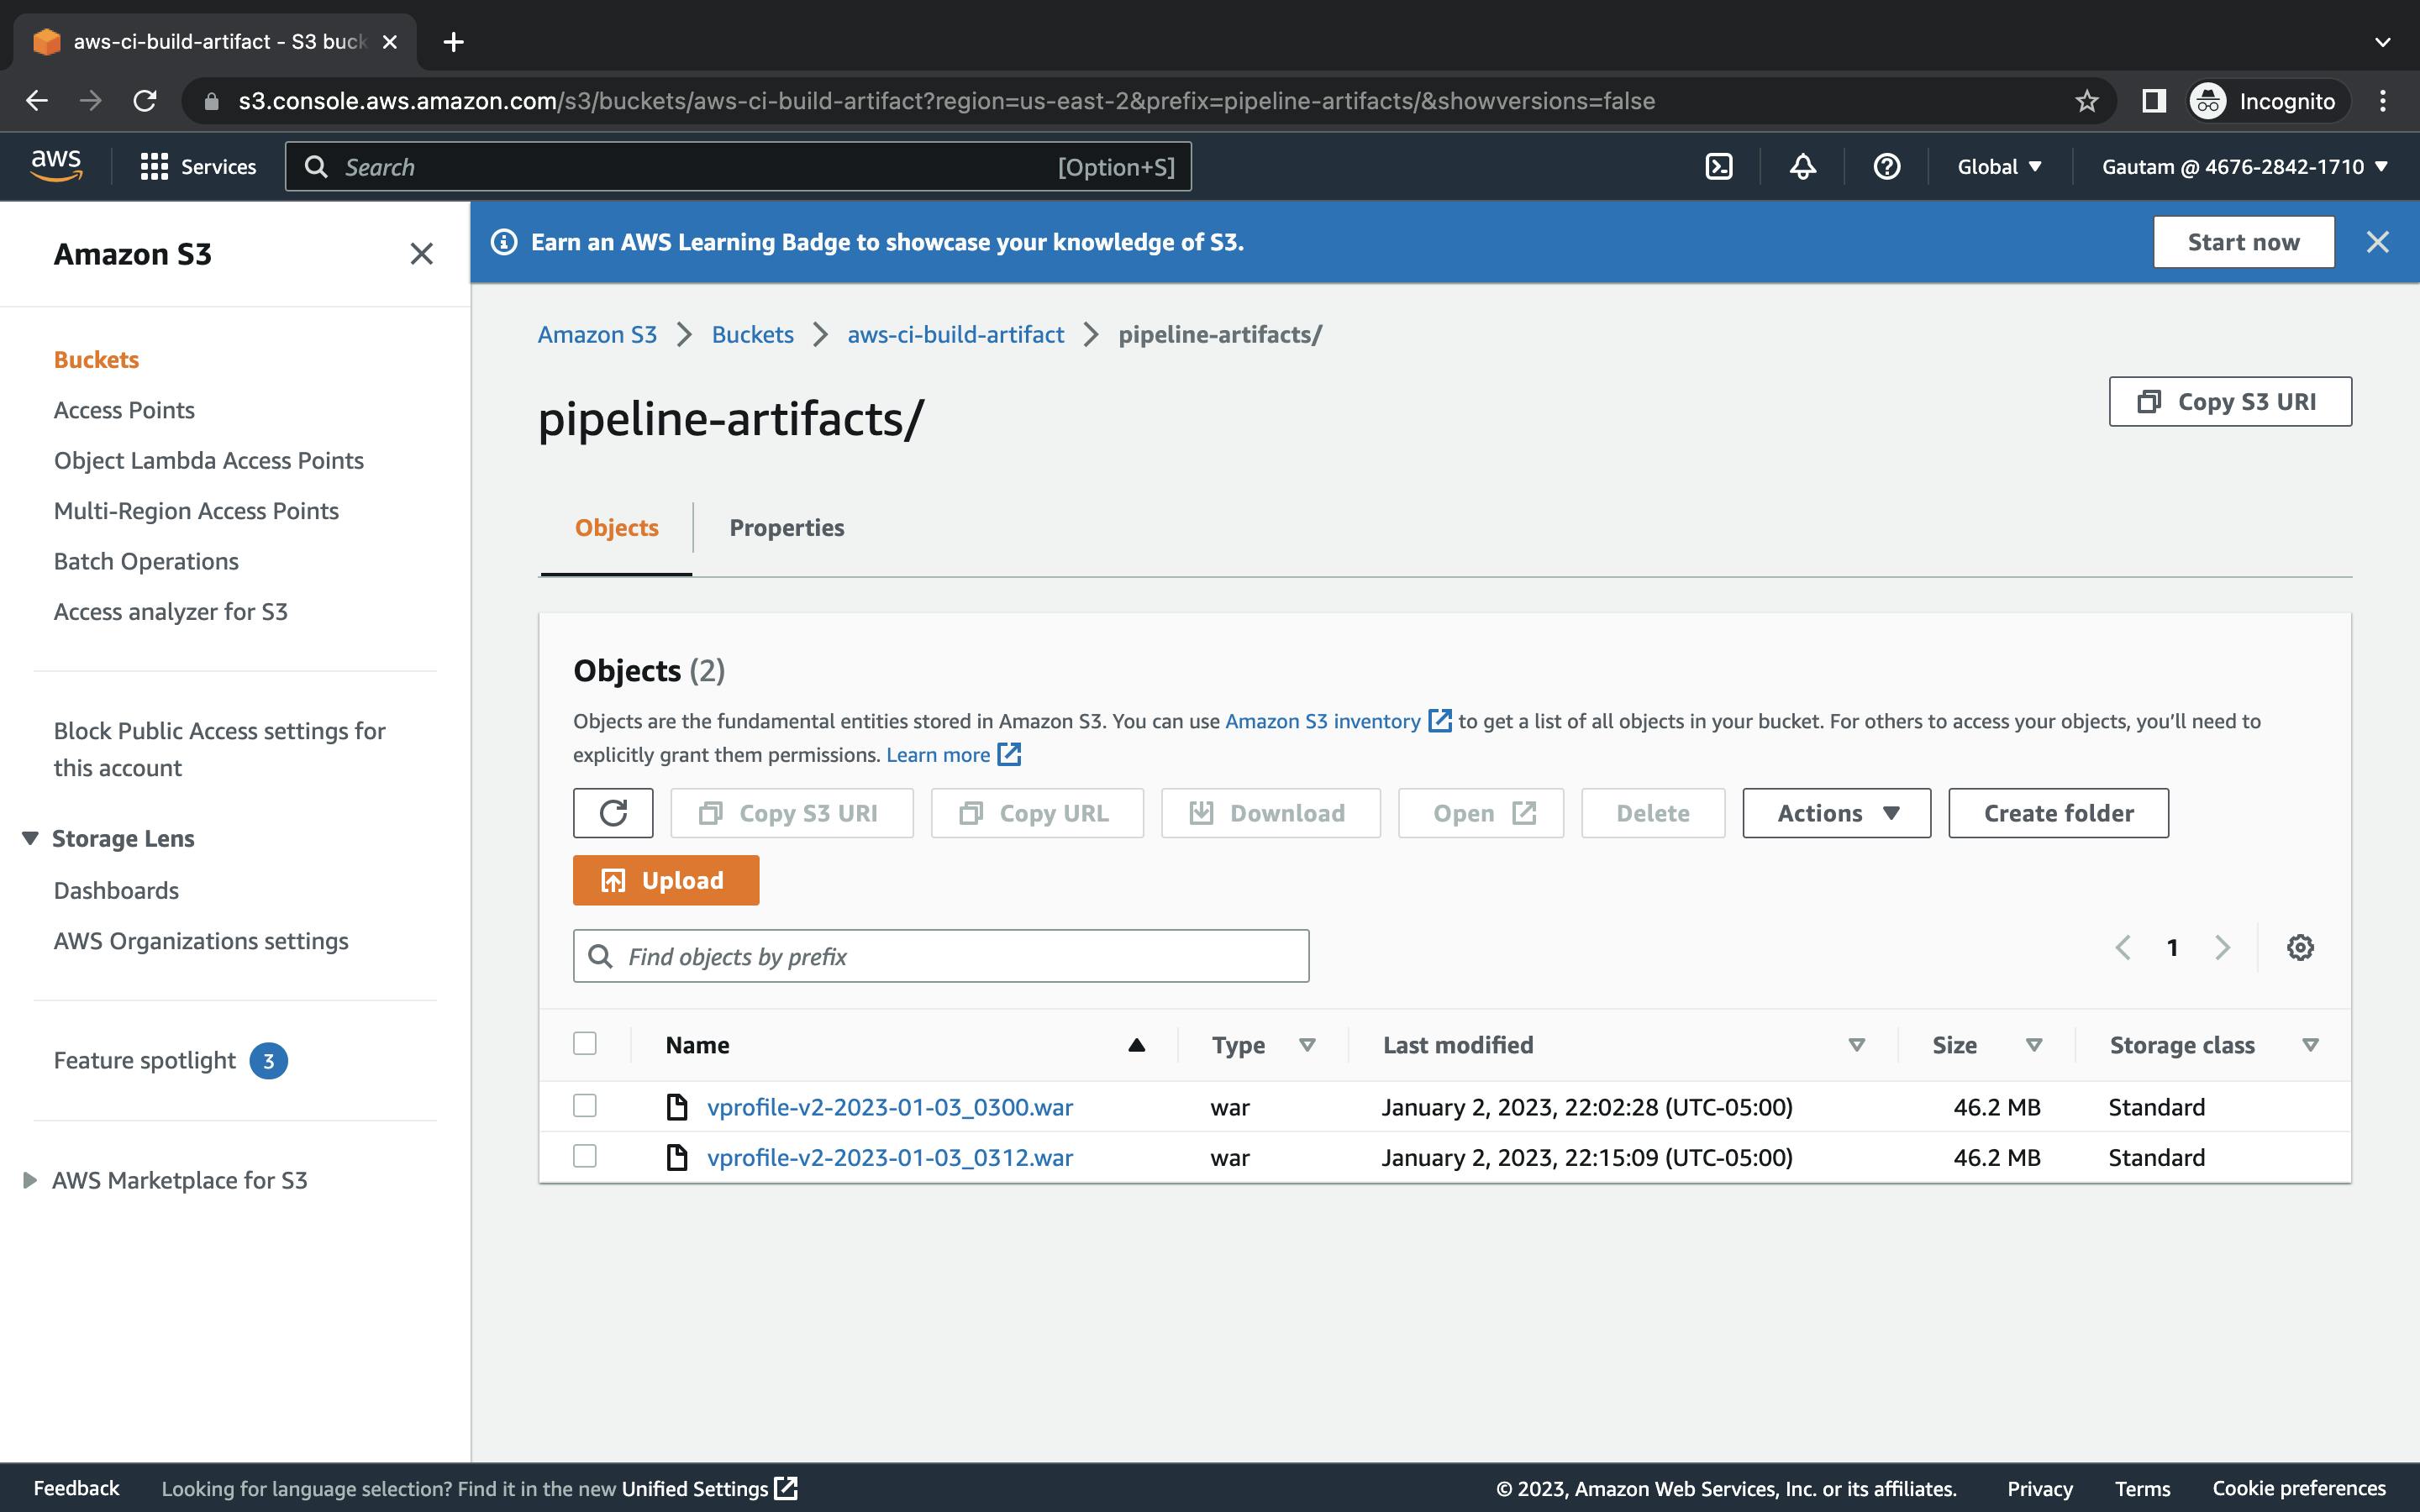
The first step is to create an S3 bucket where the artifacts produced by our pipeline will be stored.
Open the S3 dashboard in the AWS Management Console.
Click on the "Create Bucket" button.
Give your bucket a unique name and select the region where you want to create it. It is important to choose a unique name because bucket names must be globally unique across all of AWS.
Click on the "Create" button.
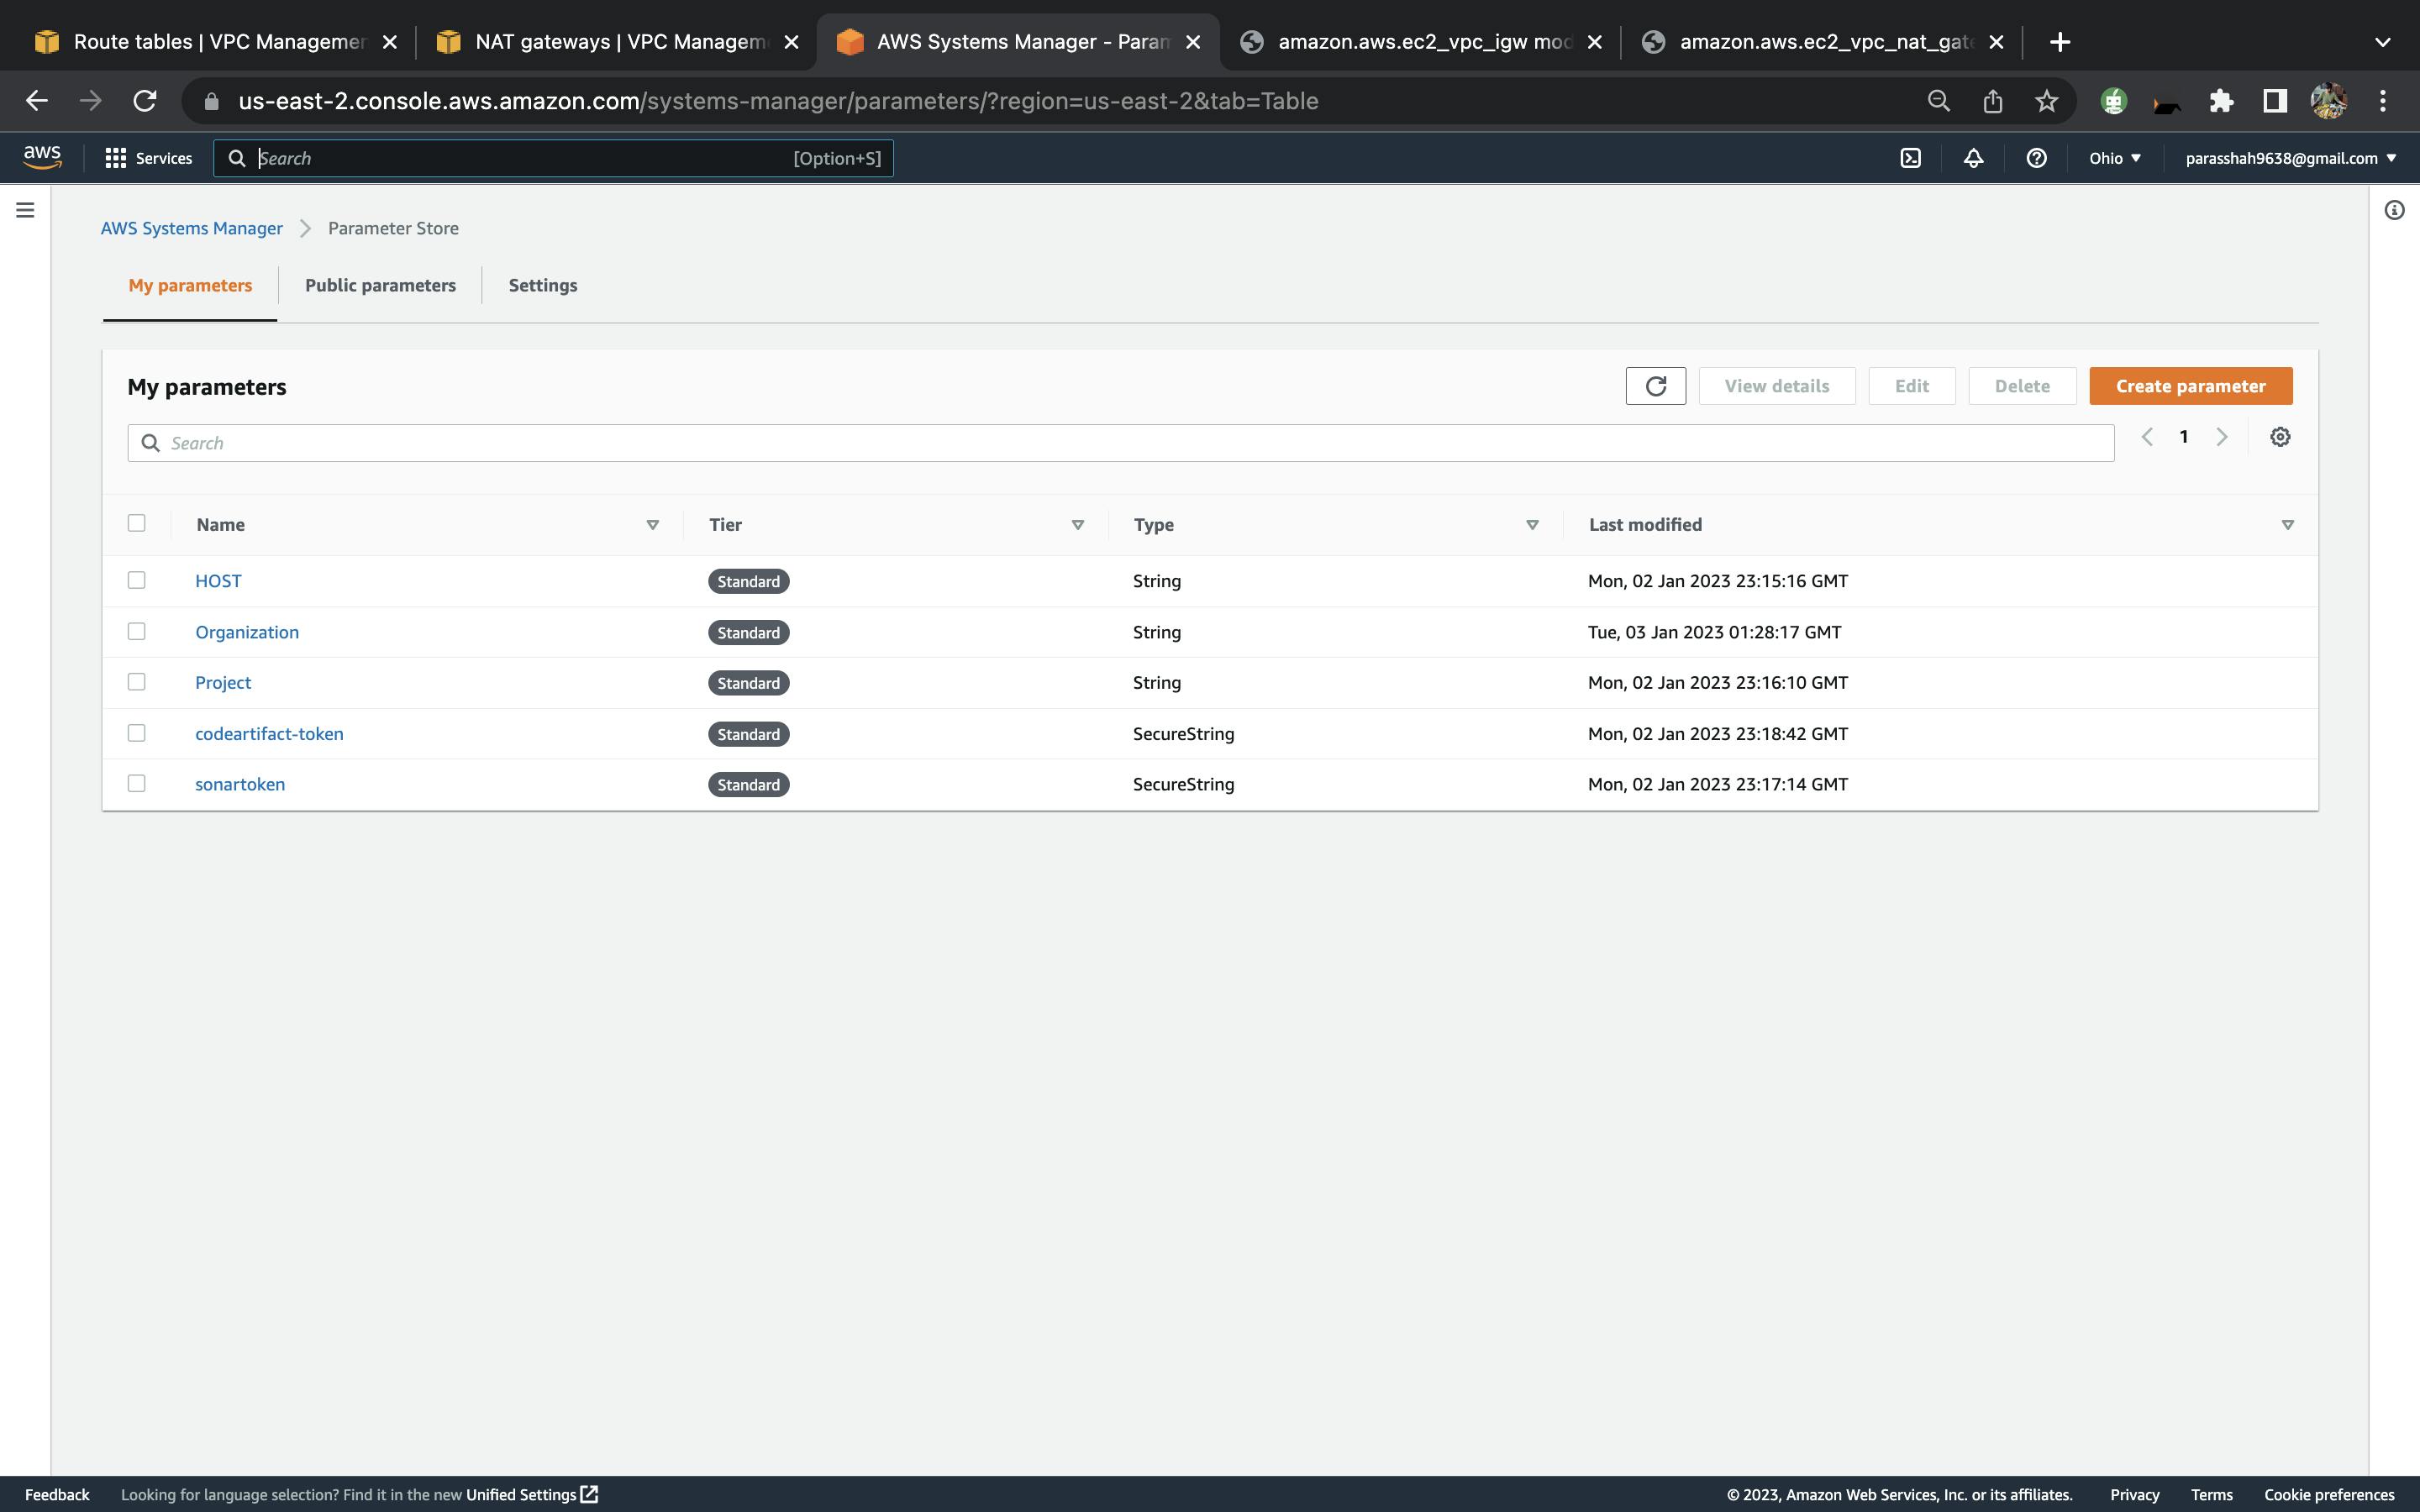
Open Parameter Store which is inside the AWS Systems Manager Resource in AWS Management Console
Here, enter the Parameter Values for Host, Organization, Project, CodeArtifact-Token and SonarToken.
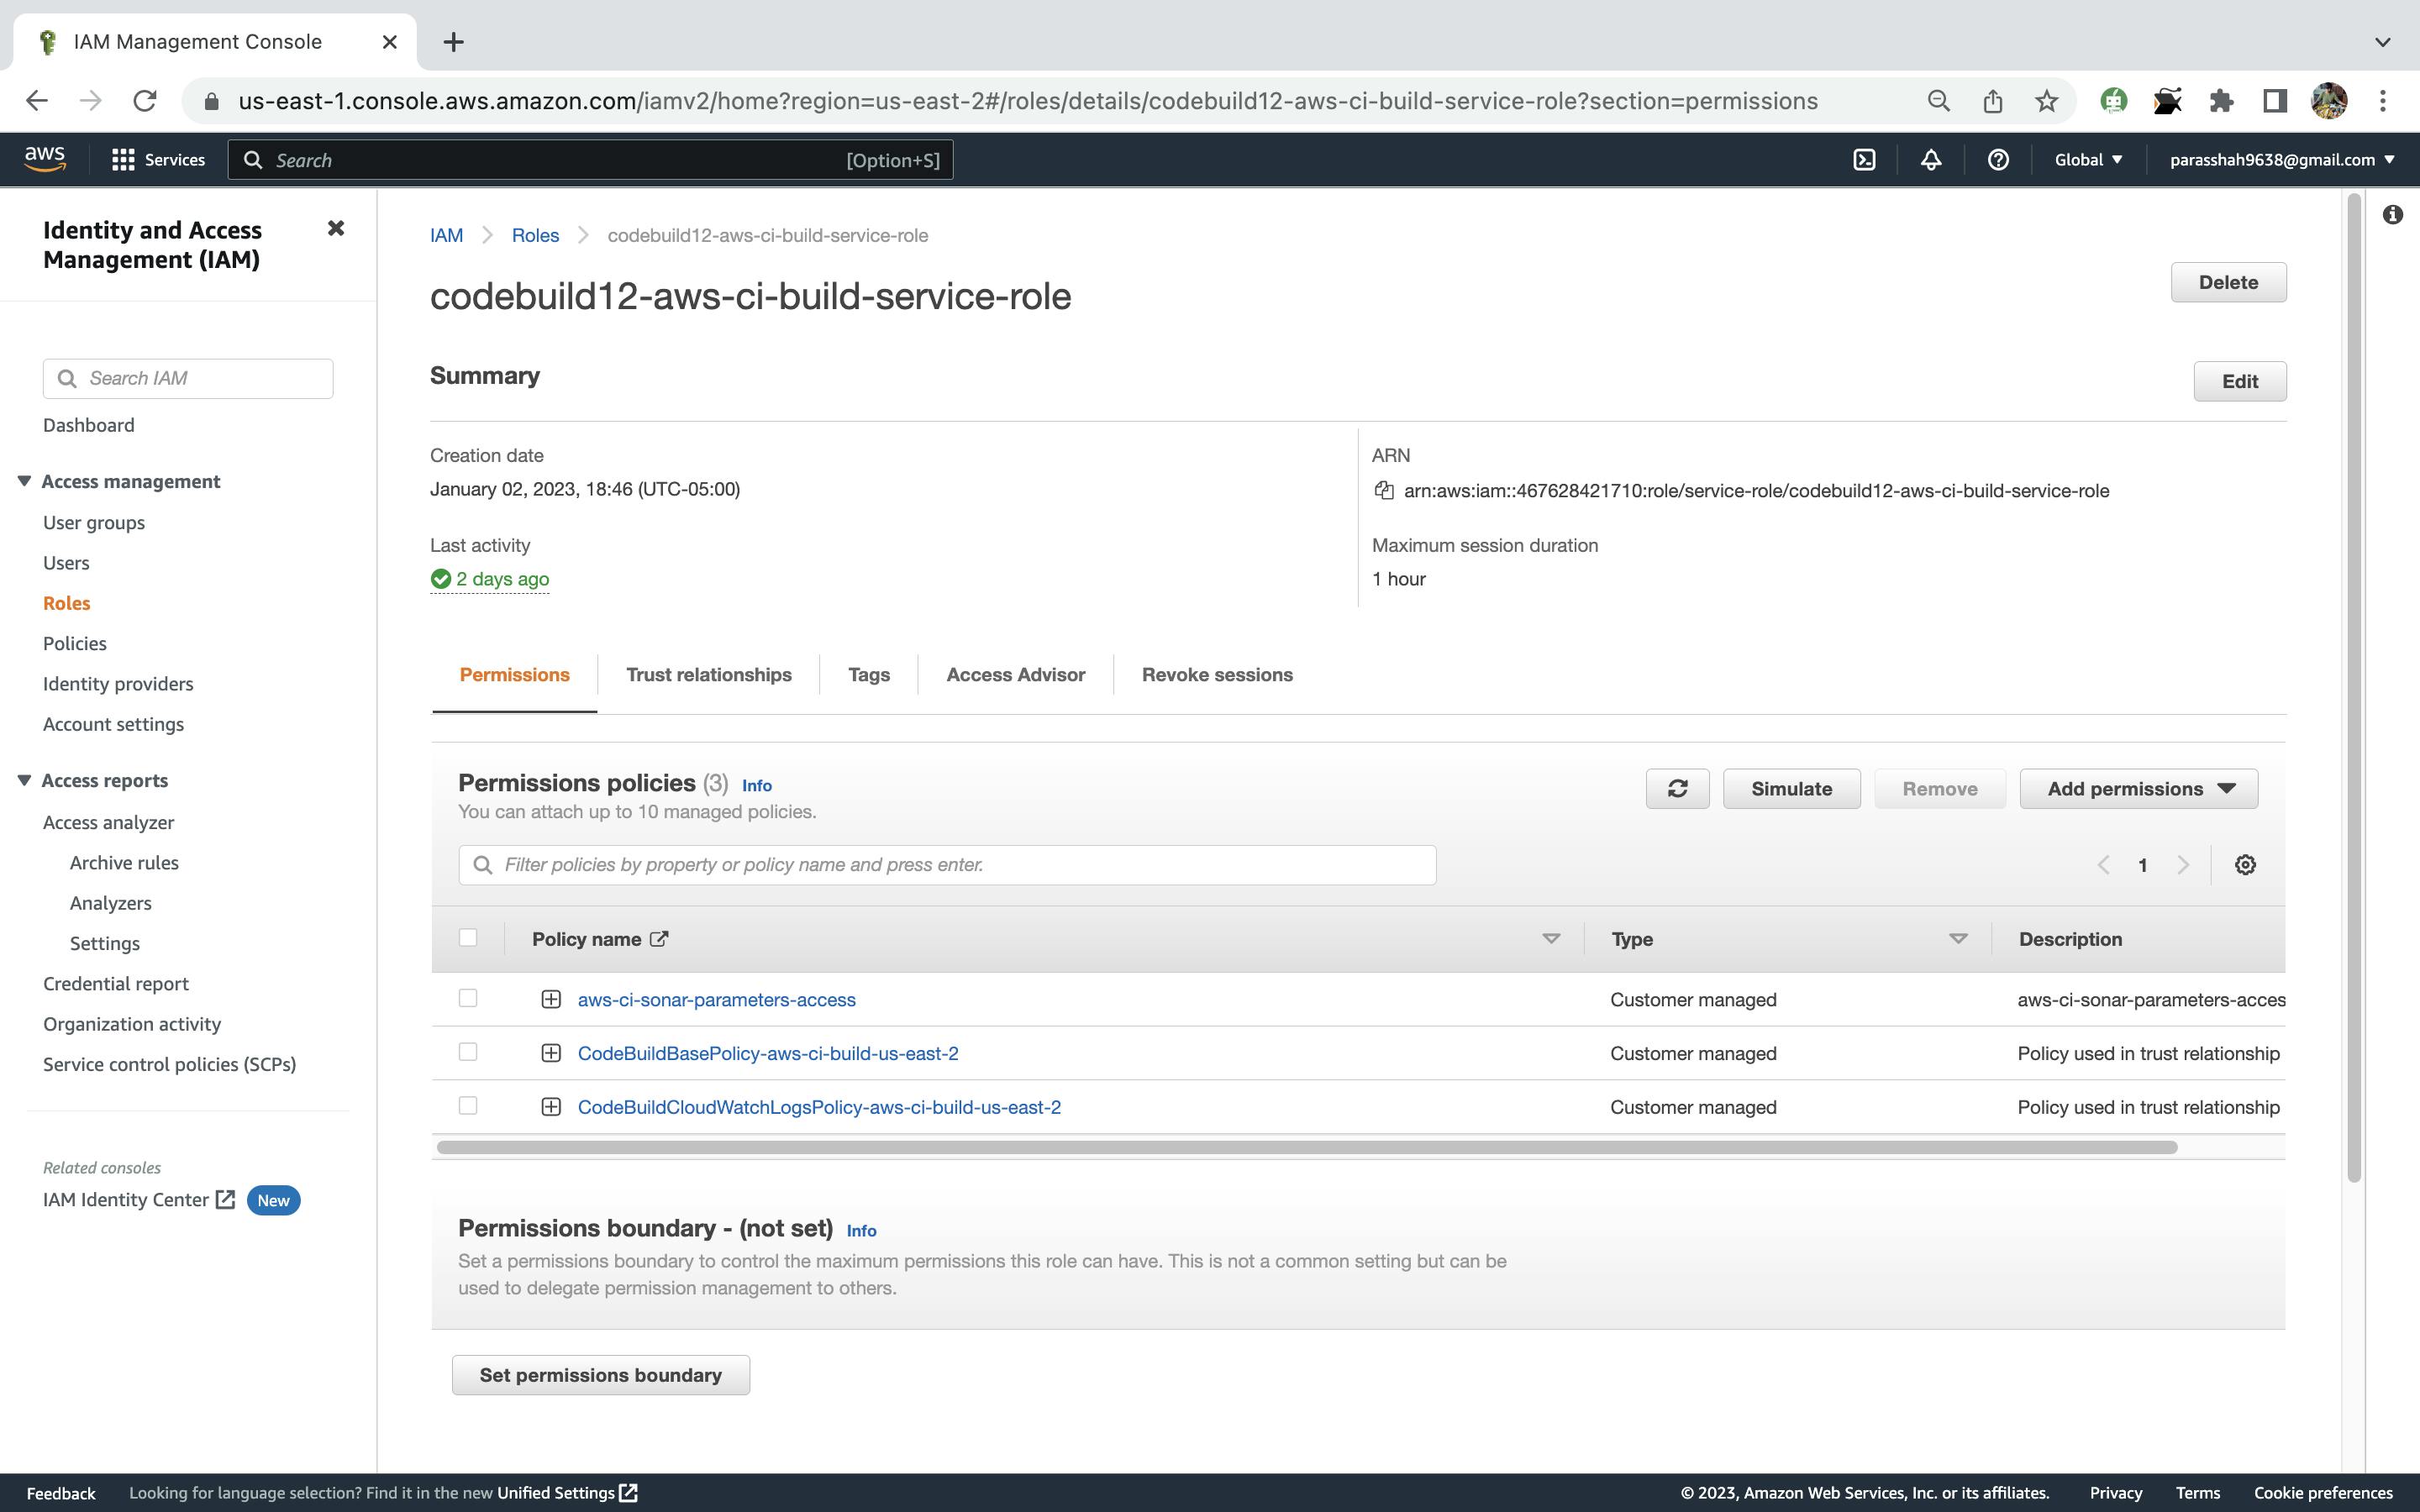
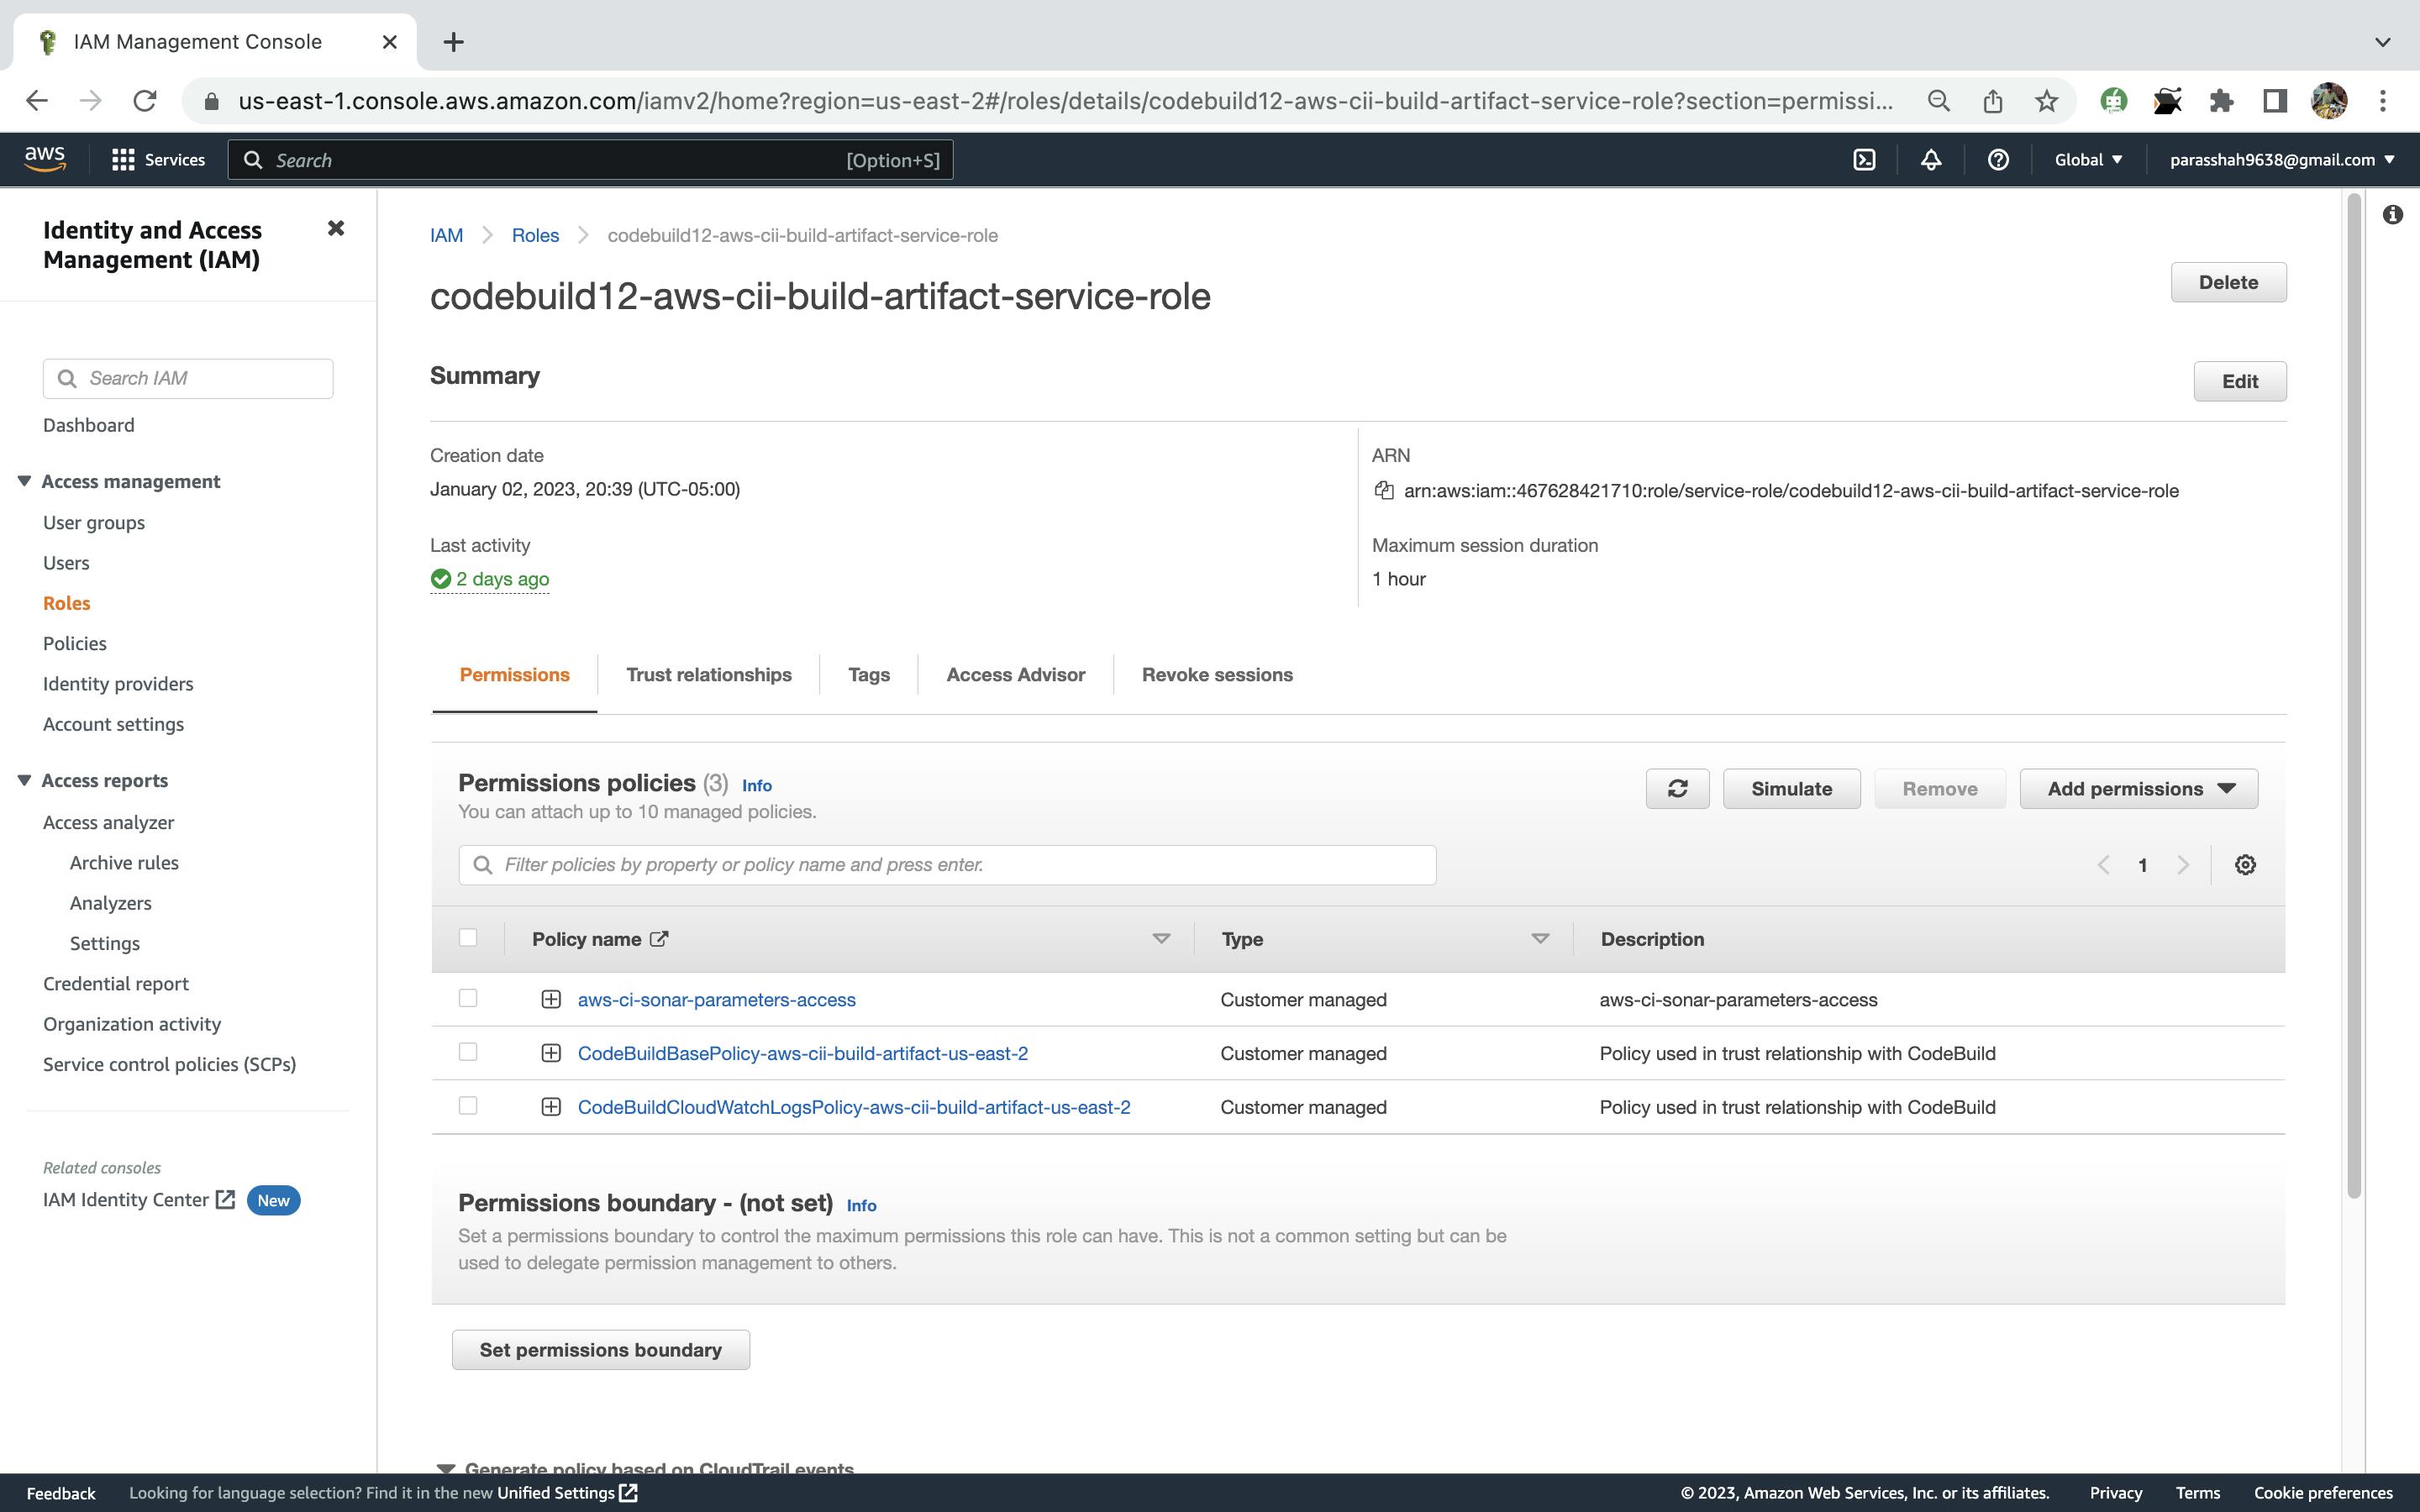
Step 2: Create an IAM Role for CodePipeline
Next, we need to create an IAM role allowing CodePipeline to access other AWS services such as CodeCommit, CodeBuild, and CodeDeploy.
Open the IAM dashboard in the AWS Management Console.
Click on the "Roles" menu on the left and then click on the "Create role" button.
Select "AWS service" as the type of trusted entity and choose "CodePipeline" from the list of services.
Click on the "Next: Permissions" button.
Select the necessary policy and click on the "Next: Tags" button.
You can add any optional tags and click on the "Next: Review" button.
Give your role a name and a description, then click on the "Create role" button.
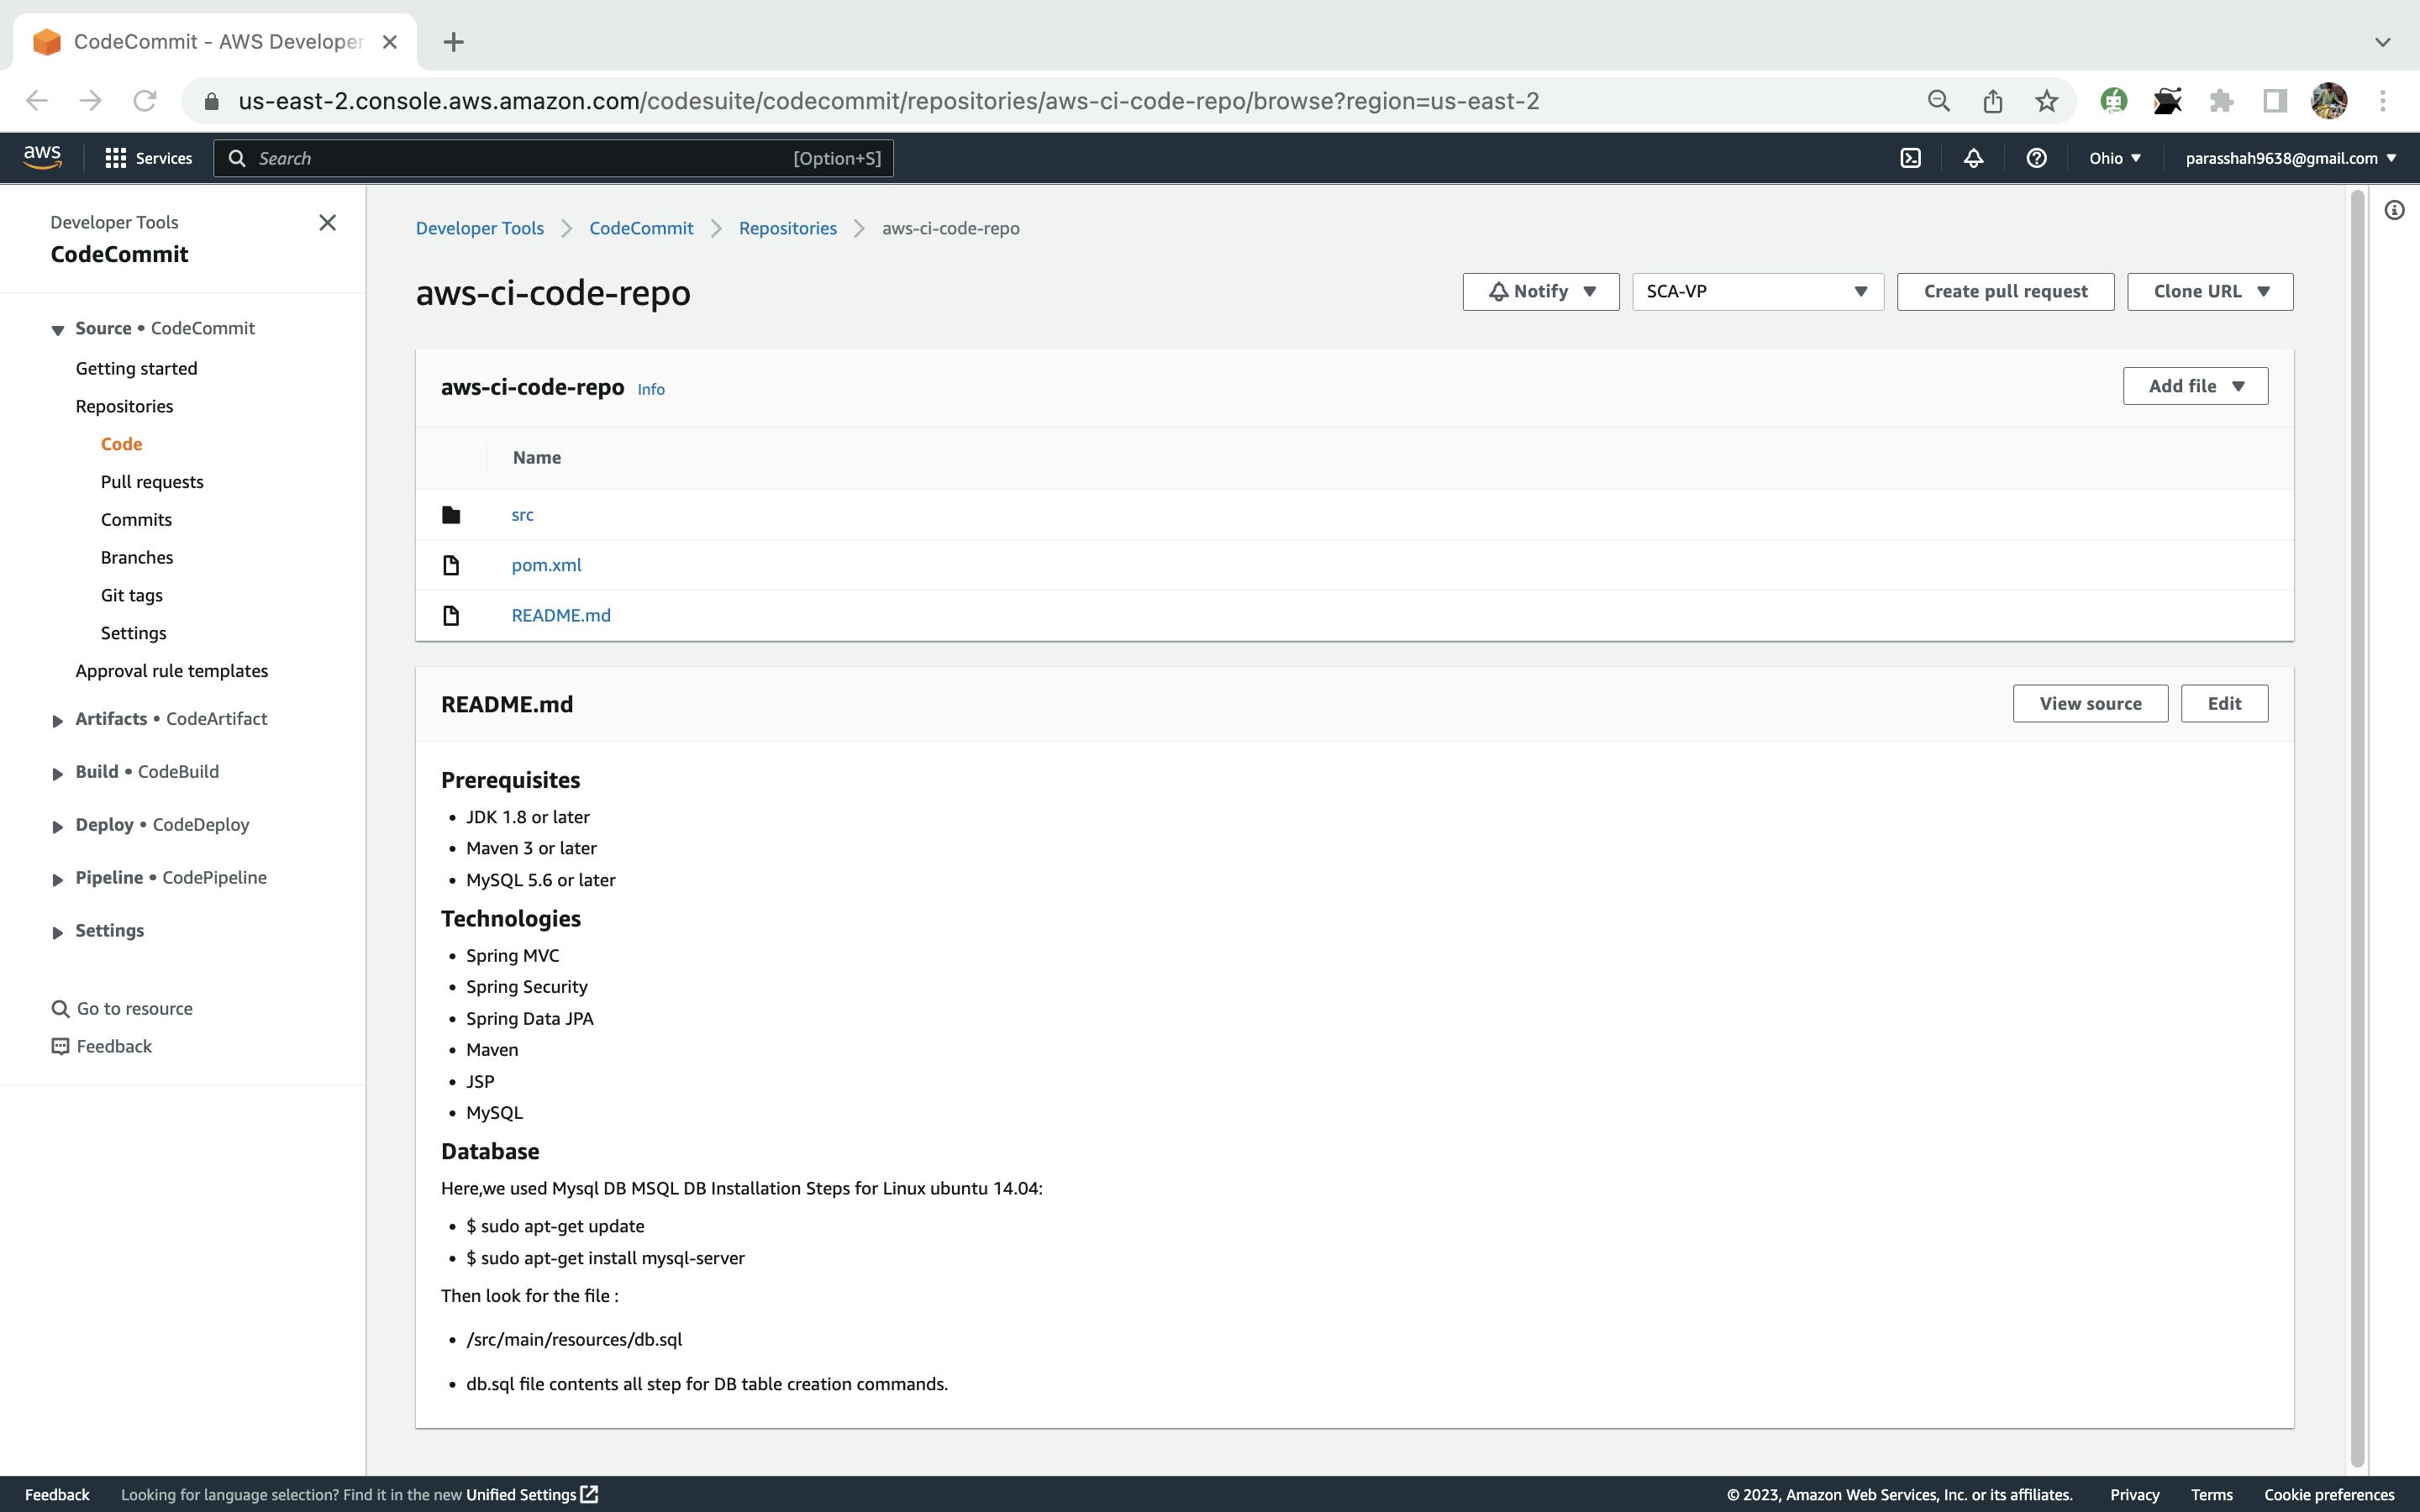
Step 3: Create a CodeCommit Repository
CodeCommit is a fully-managed version control service that makes it easy for developers to store and track code changes.
Open the CodeCommit dashboard in the AWS Management Console.
Click on the "Create repository" button.
Give your repository a name and a description, then click the "Create repository" button.
On the next page, you will see the instructions for cloning the repository to your local machine. Follow the instructions to clone the repository and add your code to it.
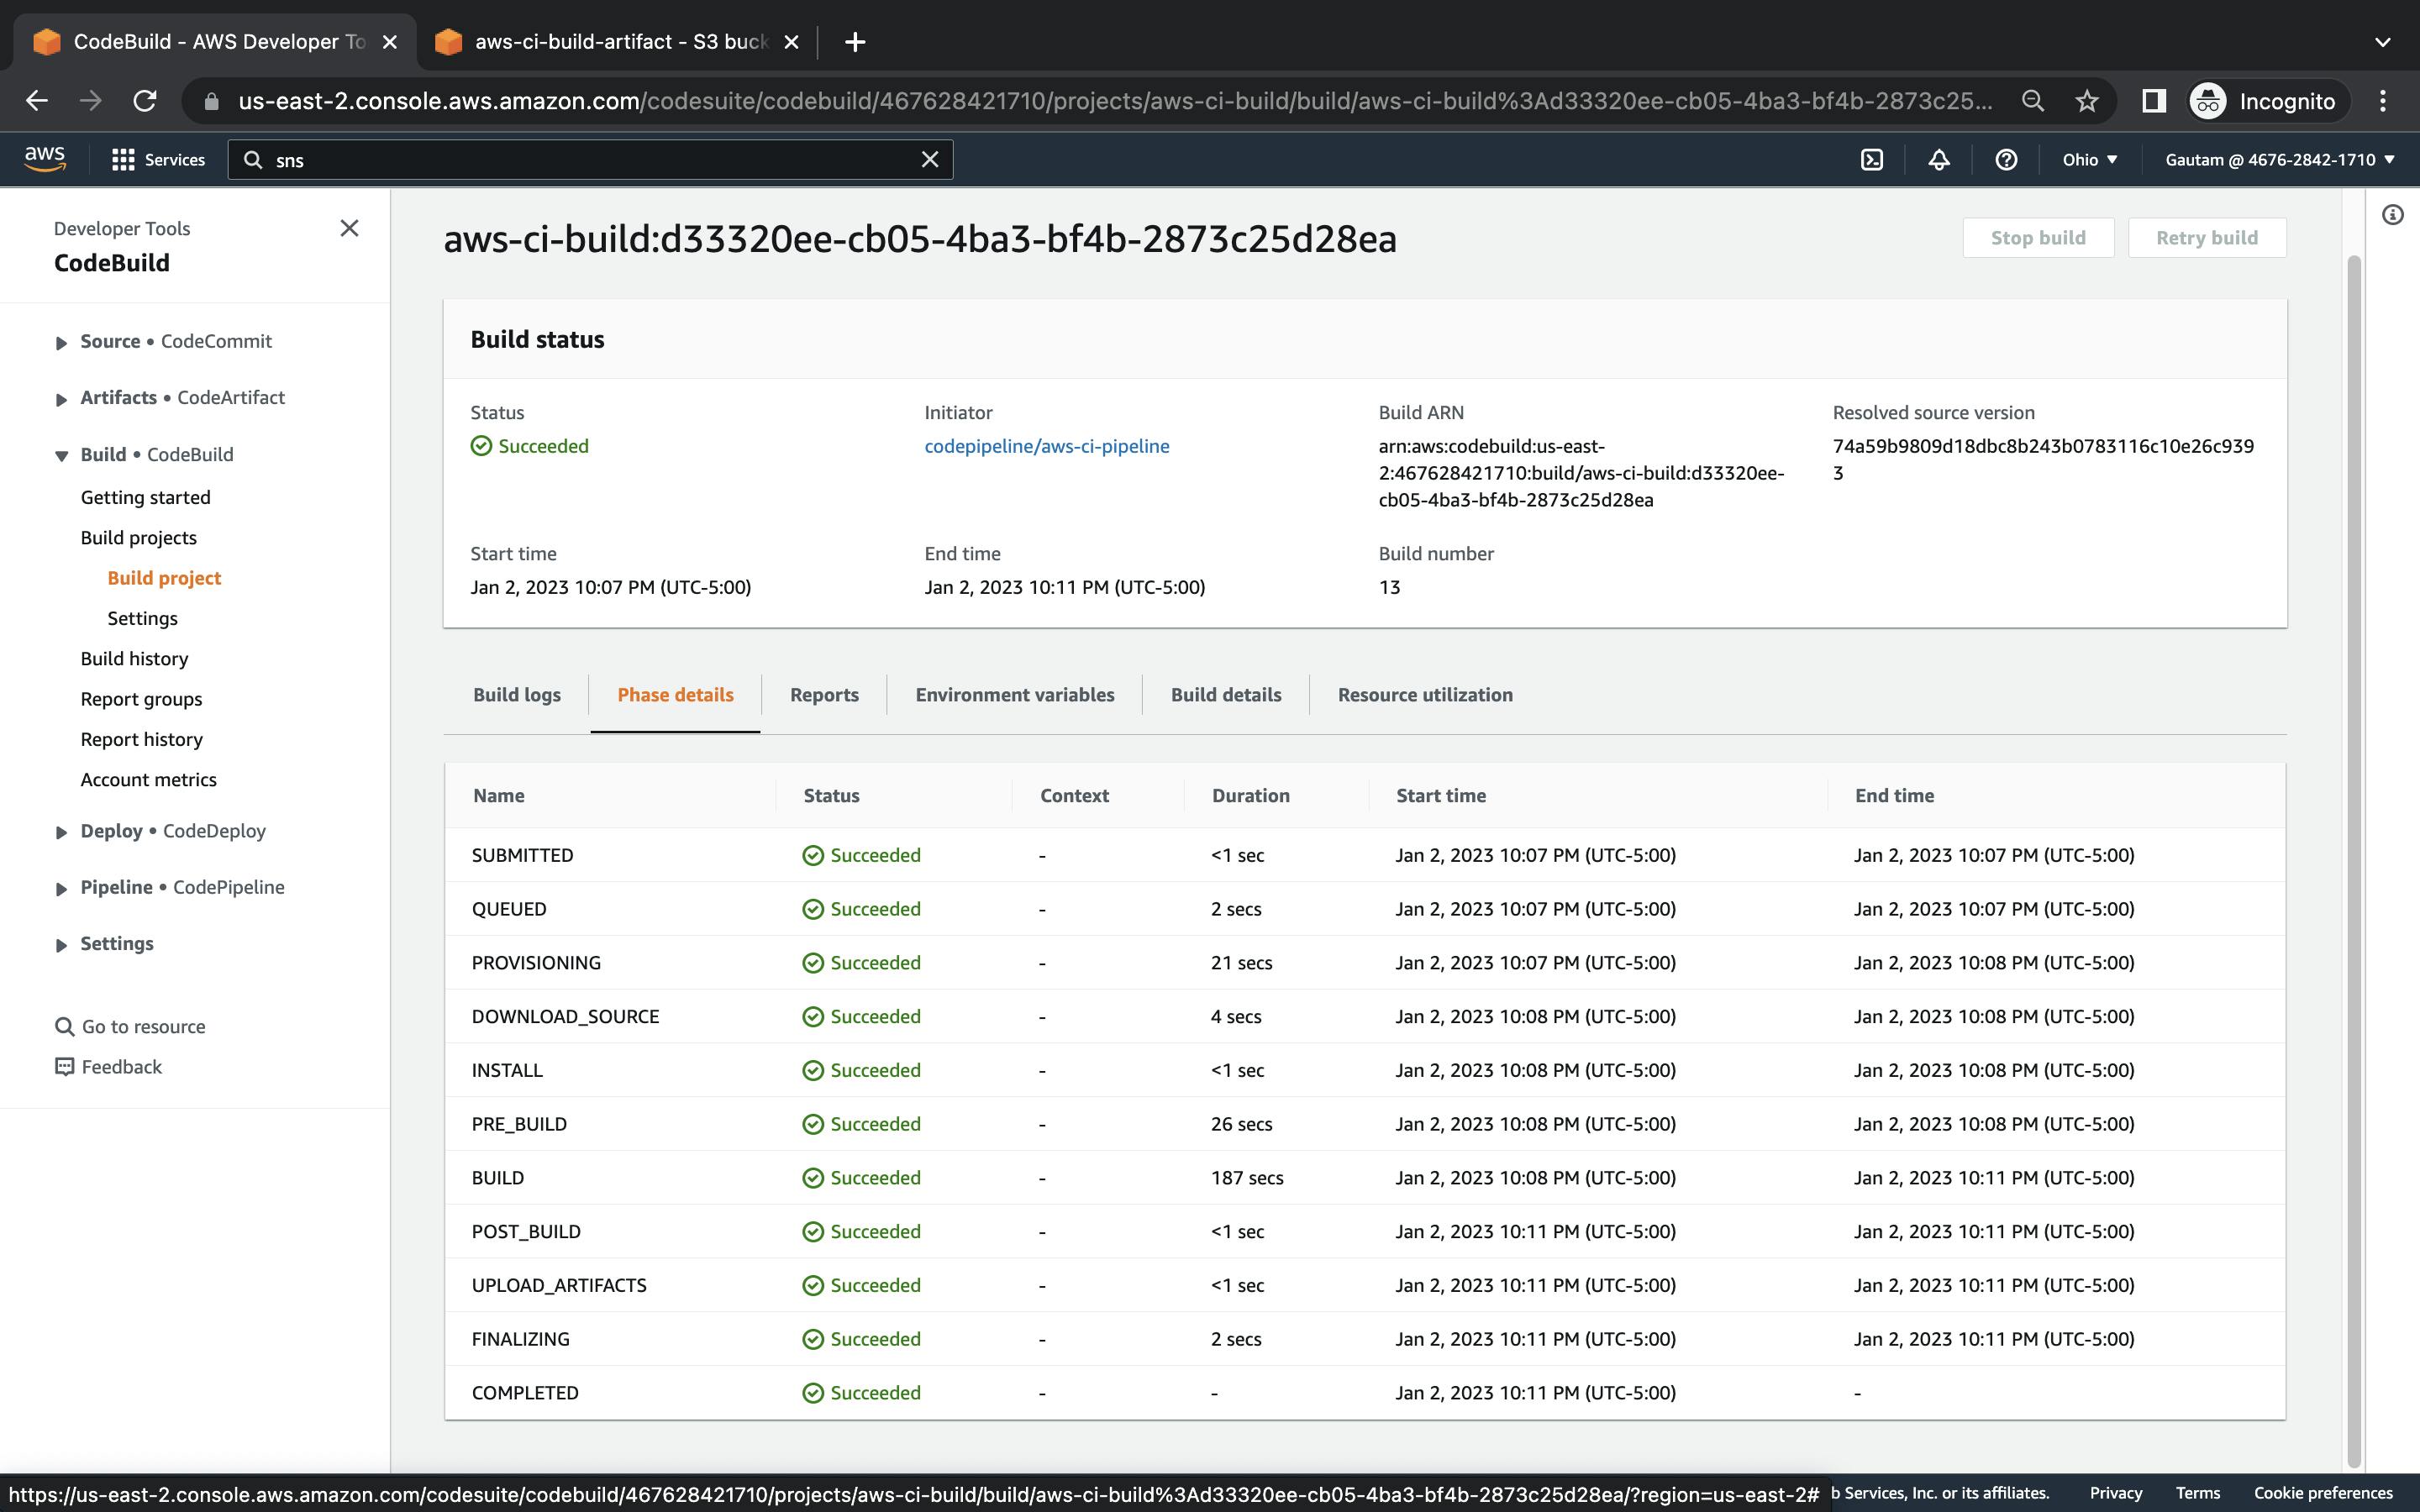
Step 4: Create a CodeBuild Project
CodeBuild is a fully-managed build service that compiles source code, runs tests, and produces software packages that are ready to deploy.
Open the CodeBuild dashboard in the AWS Management Console.
Click on the "Create project" button.
Give your project a name and select "AWS CodeCommit" as the source provider.
Select the repository and branch that you created in the previous step.
Select the runtime environment for your build. You can choose from a variety of programming languages and runtime versions.
Under "Build specification", select "Use a buildspec file" and choose the file from your repository that contains the build commands. A buildspec file is a YAML file that contains instructions for CodeBuild on how to build your code.
Under "Artifacts", select "S3" as the type and choose the S3 bucket you created in the first step. Give your artifact a name and click on the "Continue" button. An artifact is a package that contains the output of your build, such as a compiled binary or a Docker image.
Review your project settings and click on the "Create build project" button.
Step 5: Create a CodeDeploy Application and Deployment Group
CodeDeploy is a fully-managed deployment service that automates the process of deploying applications to a variety of compute services, including Amazon EC2, AWS Fargate, AWS Lambda, and on-premises servers.
Open the CodeDeploy dashboard in the AWS Management Console.
Click on the "Create application" button.
Give your application a name and select "EC2/On-Premises" as the compute platform. Click on the "Create application" button.
Click on the "Create deployment group" button.
Give your deployment group a name and select the target instances for the deployment. You can use an Amazon EC2 Auto Scaling group, a fleet of on-premises servers, or a combination of both.
Under "Deployment configuration", choose the deployment type and the deployment option that best fits your needs. The deployment type determines how CodeDeploy installs your application on the target instances. The deployment option determines how CodeDeploy handles any instances that are not in a healthy state during a deployment.
Under "Service role", choose the IAM role that you created in the second step. This role grants CodeDeploy permission to access other AWS resources.
Click on the "Create deployment group" button.
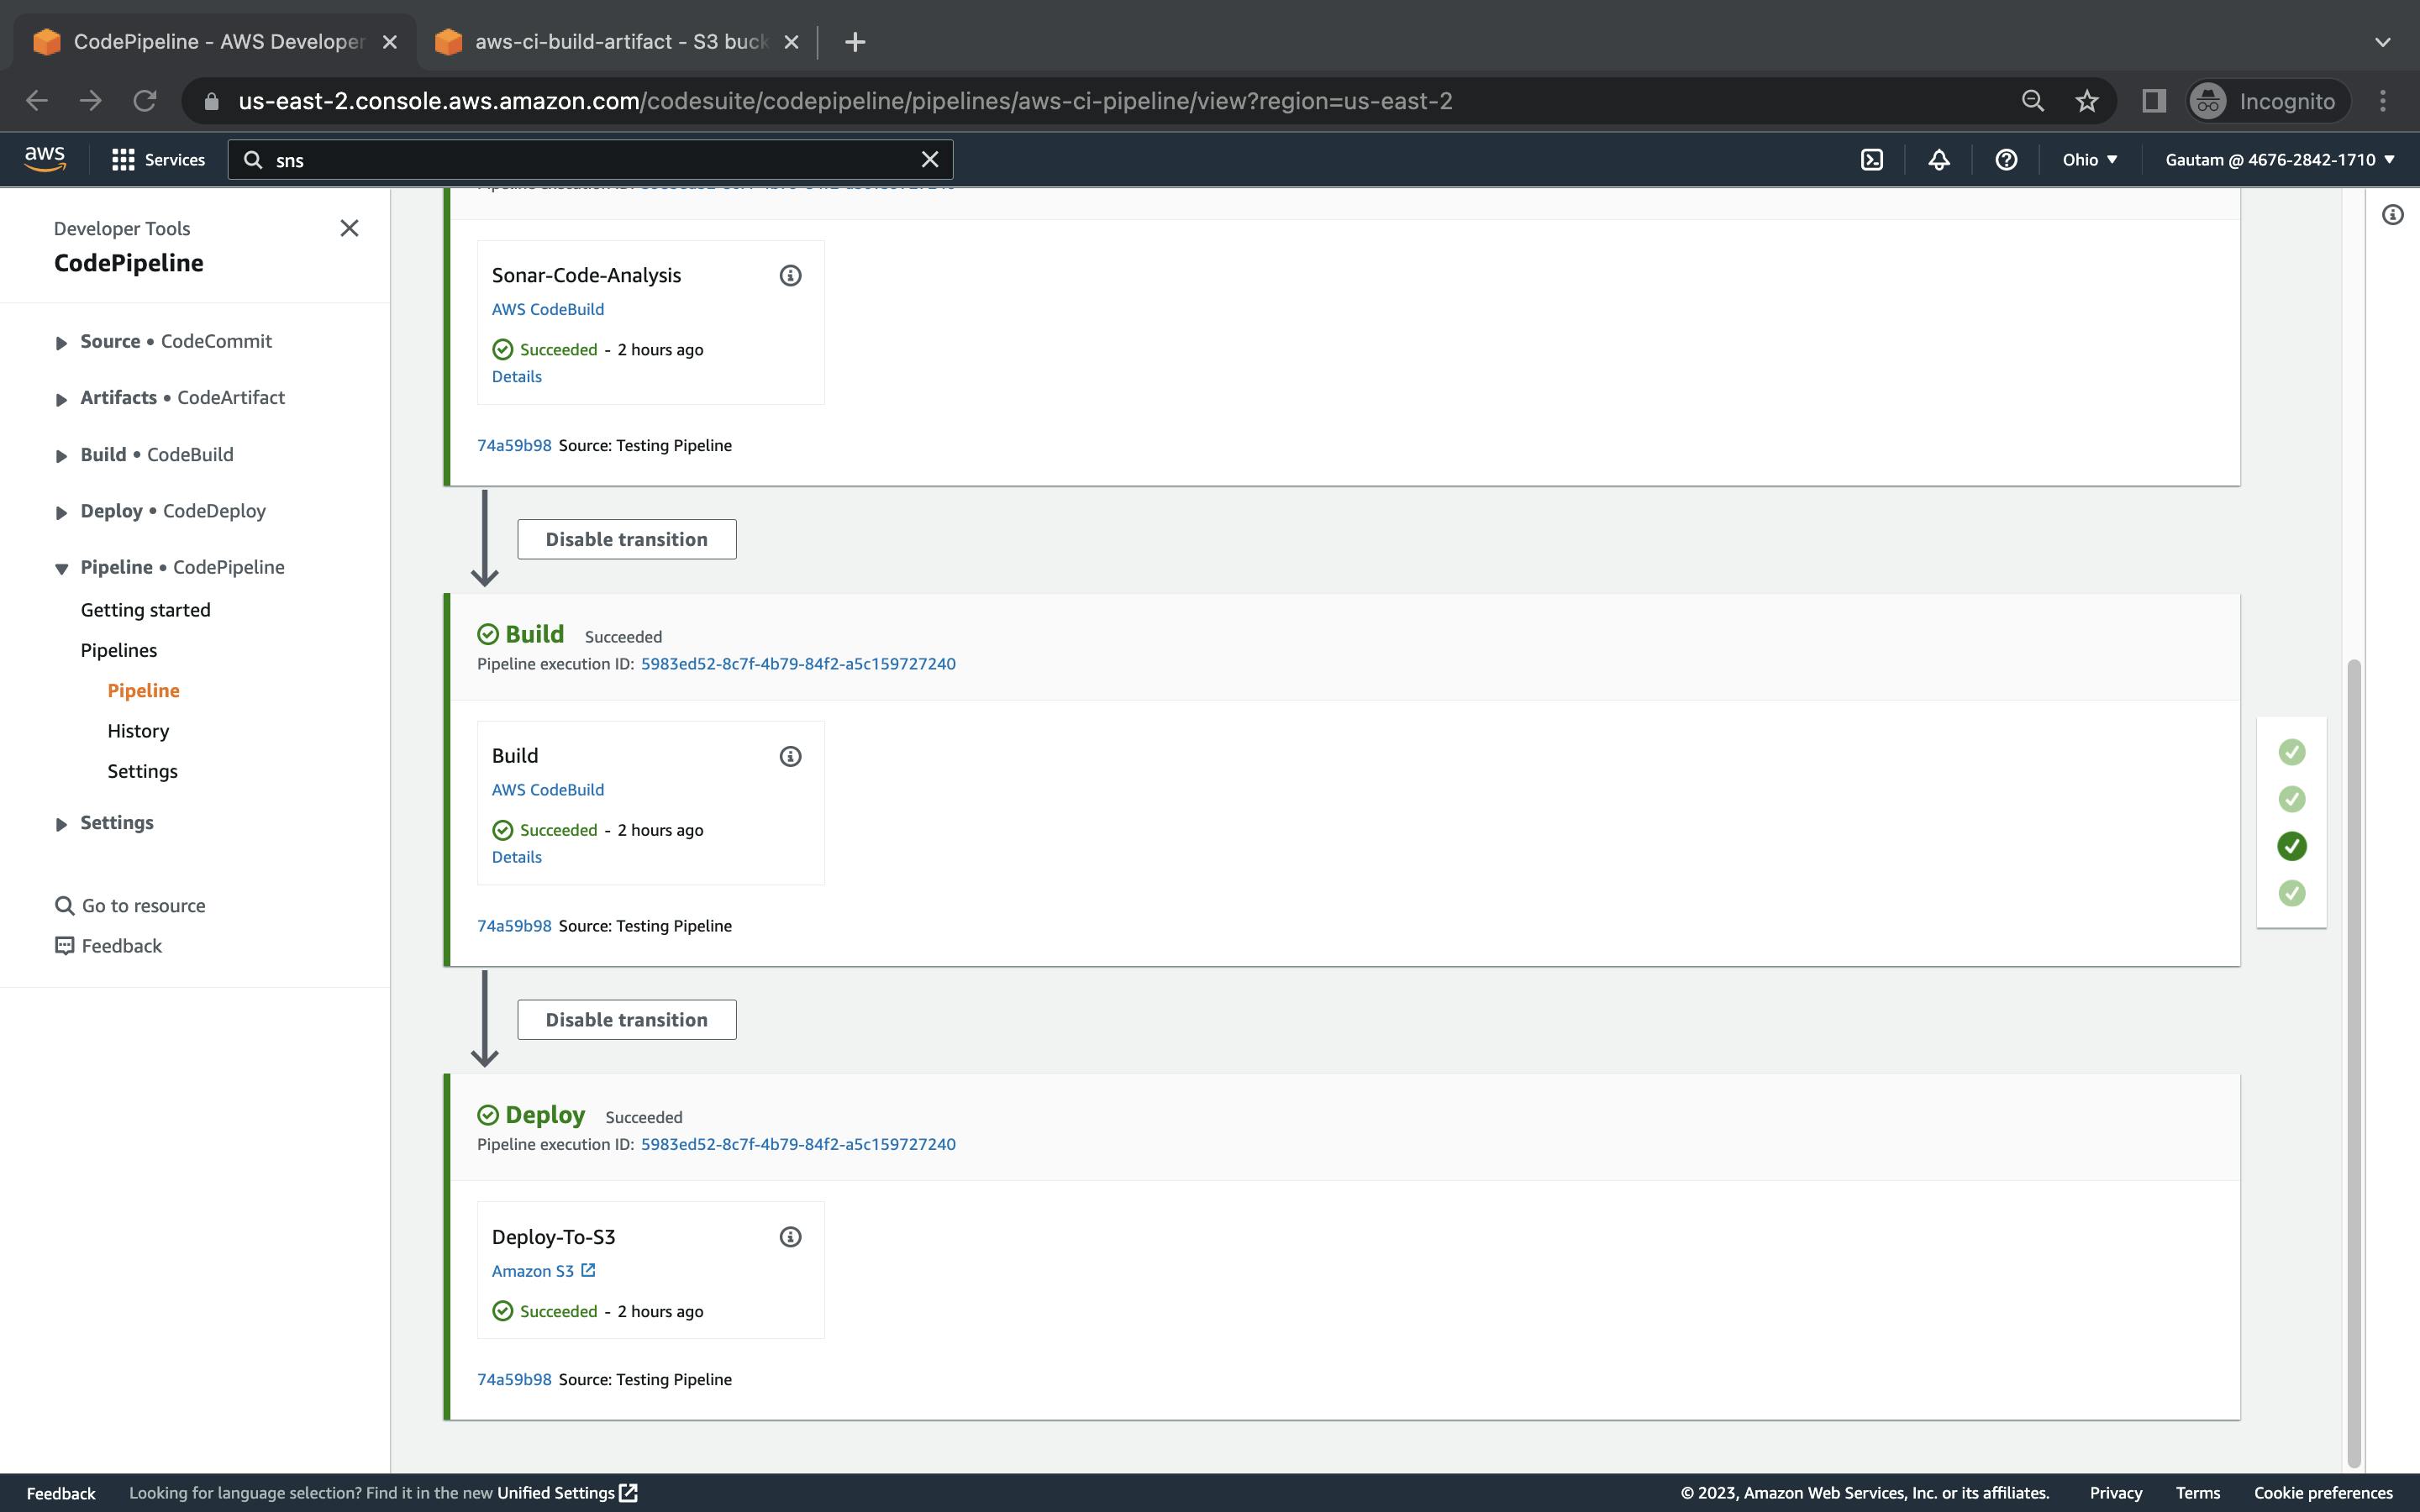
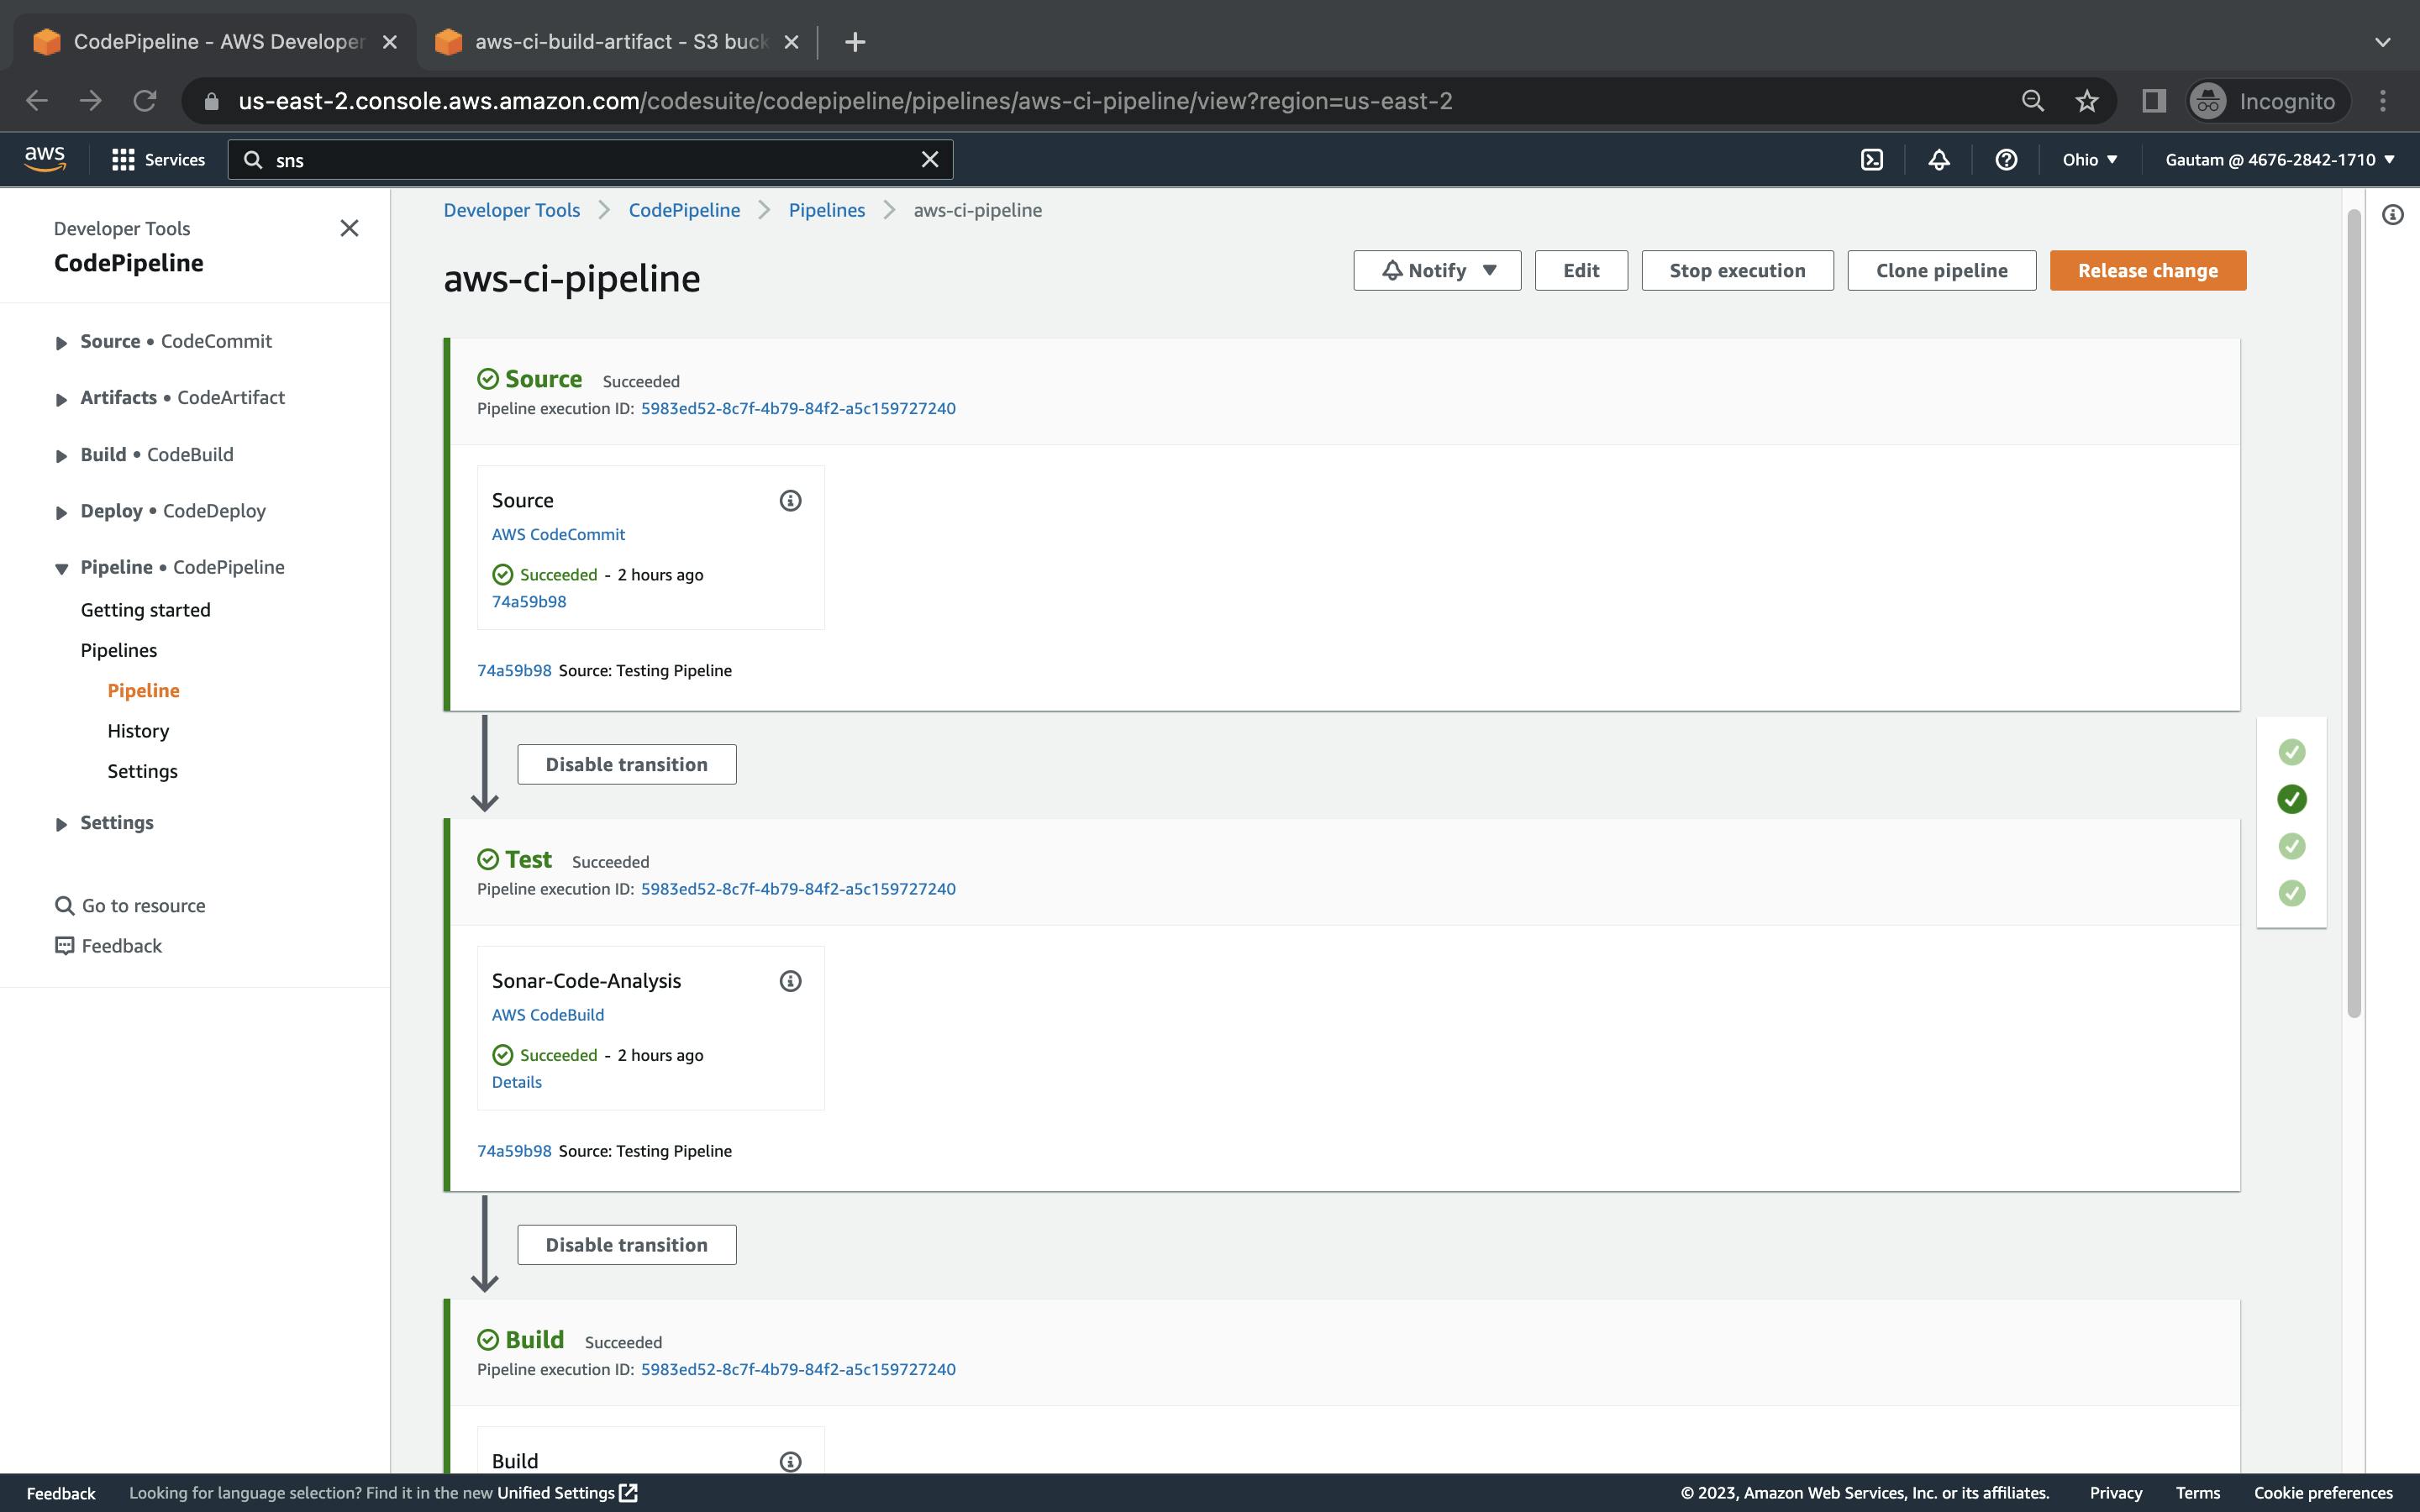
Step 6: Create a CodePipeline Pipeline
CodePipeline is a fully-managed continuous delivery service that helps you automate your release pipelines.
Open the CodePipeline dashboard in the AWS Management Console.
Click on the "Create pipeline" button.
Give your pipeline a name and select "AWS CodeCommit" as the source provider. Select the repository and branch that you created in the third step.
Select "AWS CodeBuild" as the build provider and choose the project that you created in the fourth step.
Select "AWS CodeDeploy" as the deploy provider and choose the application and deployment group that you created in the fifth step.
Under "Artifact store", select "S3" and choose the S3 bucket that you created in the first step.
Click on the "Create pipeline" button.
That's it! You have successfully created a continuous integration pipeline on AWS Cloud using AWS CodeCommit, CodeBuild, CodeDeploy, and CodePipeline. Your code changes will now be automatically built, tested, and deployed to your target instances whenever you push to the CodeCommit repository.